For a long time, I've struggled to take good photos of my warhammer models. I have both a DSLR (moderately old at this point, Nikon D3100 with an 18-55mm lense) and an iPhone. Usually, I don't bother taking pictures with the DSLR because the lense I have is not particularly great for macro photography, whereas the iPhone sensor is much better suited for it (I believe due to the compact nature of the sensor).
However, I noticed when I was taking photos with the phone that my models were ending up looking incredibly over saturated, and that I had to do significant colour adjustment after the fact. It would result in photos that I wasn't happy with because they didn't represent the painting work I had done.
Therefore over the last few days I have been playing around with the setup of where I take my miniature photos, and getting used to the different settings of the DSLR so that I understand how changing each setting affects the quality of the picture being taken.
The miniature painter Miniac has an excellent video on the subject here, which is where I got much of my understanding of what to do.
Here is an example of a photo I've previously taken using my iPhone camera:
The iPhone Shot
I would consider the quality of this photo fairly poor. Disregarding the staging of the photo, there is obvious high spots in the white colours, the reproduction of the colours themselves are not great and are oversaturated, and the image feels quite flat.
The Staging
The first thing that needs addressing is the staging. I want all of my photos to be taken against a neutral background, so that focus is drawn entirely to the miniature itself, and the colours in play in the background do not affect the balance of the image. Some photographers use LED light panels to project different colours onto a white background, and whilst that is something I may play around with in the future, for now I like the dramatic nature of the black background.
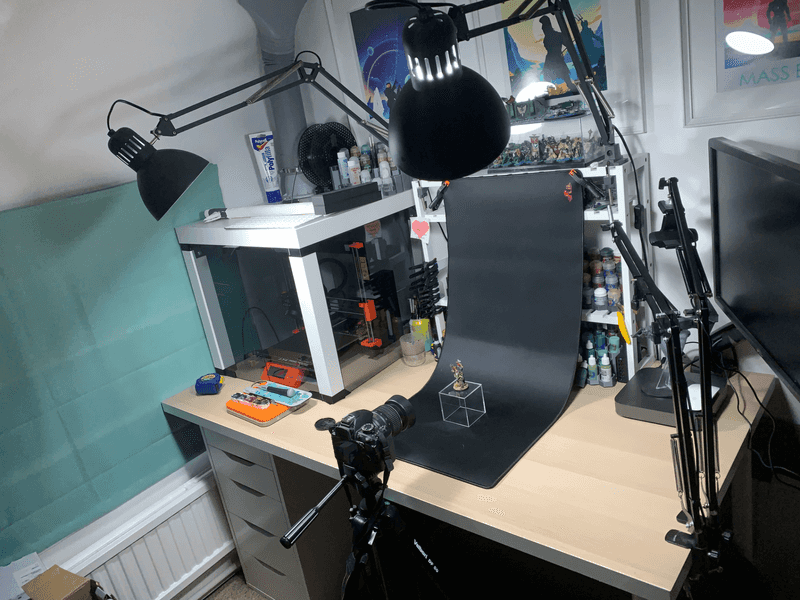
Here is a photo of the setup. All I have done is taken my painting mat (currently a 400mm x 900mm mouse mat) and clamped it to my paint shelves. Then I drape it down so it curves behind where I would place the model, so no sharp corners are present.
There is one other critically important element to the setup shown here, which I will talk about in the next section.
The Lighting
The lighting you use affects everything. In general, you should to use a single colour temperature to light your miniatures. What this means is that if you are taking photos, the best time and place to take them is away from any windows (or better yet, at night) with only the lights on that you will use to actually illuminate the model. For me, that means I turn off the room light, close the blind, and only illuminate the model using the two 6500K (daylight) bulbs that are in my painting lamps.
Sidenote - You don't have to use angle lamps for this. If you have a task lamp you could also use it to take photos - the most important part of where the light falls against your model is that you are eliminating shadows as much as possible. I don't have a task lamp, which is why I use 2 lamps.
The only time you would introduce a second light colour/temperature, is if you want to provide a contrast light on the miniature itself (for example, using a red/orange light to simulate the glow from fire)
Second sidenote - I use high CRI LED bulbs (>90%) for my painting. This helps with distinguishing colours
The other important factor with lighting and DSLRs is making sure you set the white balance correctly. Some cameras allow you to manually set the white balance to the same colour temperature as the lights by selecting the number, whereas some (like mine) require you to take a photo of a white sheet under the light source. You can adjust this in post-processing, but it's easier to set it up correctly in-camera.
Finally, you may want to use some kind of diffusion on the light sources. This is optional, but will remove hard shadows should any remain in your setup.
Positioning the Camera
In the photo above, you can see the camera is positioned about 8 inches away from the mini. You can either take the photo from further back, or zoom in a little and crop in to the miniature in-camera, but be aware that zooming in will result in less light entering the lense, so you will need to adjust the other settings to compensate. I generally take my photos at a wider angle (18-22mm) and then crop in post-processing.
The important factor here is to be face-on to the mini, and at the same height. I find that the best neutral position for taking a good photo is where there's little to no downward angle on the lense.
Getting the Settings right
OK - this is the meat of what we're trying to do. In order to take a good photo I need to adjust 3 main settings:
- Aperture Size
- Shutter Speed
- ISO
The three of these work together to affect the focal length and the amount of light that is let into the lense. To make things easier in post-processing, I also need to shoot in RAW. This was a simple format change in my camera settings.
Shutter Speed
This one is straight forward. Shutter speed will be a number from something like 30' (30 seconds) all the way to something like 1/200 (1 200th of a second). As you might imagine, a 30 second shutter speed will let in a lot of light, and a 200th of a second shutter speed will let in very little light. This will need to be adjusted to compensate for...
Aperture Size
The aperture is the part of the lense that actually lets light through. It is an opening and closing disk which affects the amount of light passing through to the sensor. It is usually measured with an "f" value (and is sometimes called an "f-stop").
The aperture also dictates the depth of field of the lense. This means the relative amount of space that will be in focus at the focal point - from the closest to the farthest object. The wider the aperture, the lower the "f" value, but the shallower the depth of field. Ideally, you want to set an aperture size that covers the entire "depth" of the model you are trying to photograph, so that all the details on the model are sharp in the image. An alternative method for achieving this is known as "image stacking", where you take multiple images with different focal distances and post-process them. However, setting the aperture size correctly does this for you in a single image.
Unfortunately, when you set the aperture size to a higher value (thus closing the aperture down), it has the knock-on effect of reducing the amount of light entering the sensor. This can be compensated for using...
ISO
The ISO is a value which denotes the sensitivity to light. A lower value is a lower light sensitivity, and a higher value is a higher sensitivity (i.e. more light). However, a higher value also results in more noise in the image, which, when taking a picture of a miniature, is undesirable.
Ideally, you want to keep the ISO moderately low, and adjust the amount of light being gathered by using a slower shutter speed.
When adjusting these settings appropriately, you will be able to take photos where the light is sufficient to light the entire model, with the entire model in focus, and then take the pictures over to a photo post-processing application to do some final adjustments.
I generally use the following settings, but your settings will be entirely dependent on the environment you're taking your pictures in:
- Shutter Speed:
1/5 - Aperture Size:
f13 - ISO:
400 - White Balance:
6500k
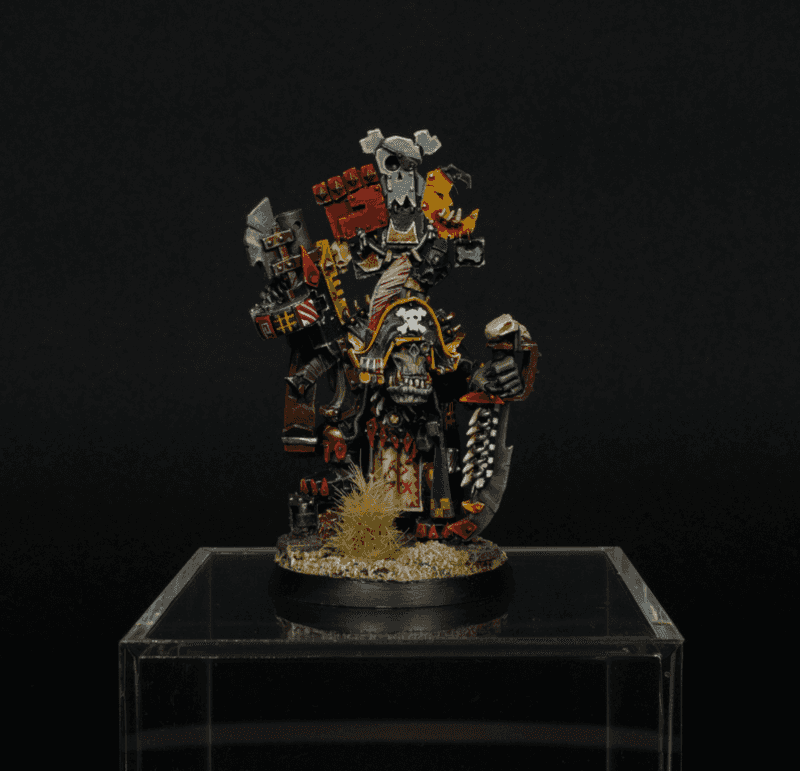
Resulting in a picture that looks like this:
After that, I take the photo into a post-processing software. Most people use something like Adobe Lightroom or Photoshop, but I like using non-Adobe software, so I use Affinity Photo, which is extremely similar to photoshop, but with the added bonus of being sold on a perpetual license, rather than a monthly subscription. (and it only costs 2 months worth of Photoshop subscription...)
In software, I only do 4 things:
- Adjust the Exposure (usually by 0.4 - 0.7 points)
- Adjust the Blackpoint (usually by +/-1%)
- Adjust the Brightness (usually by no more than 4%)
- Remove noise
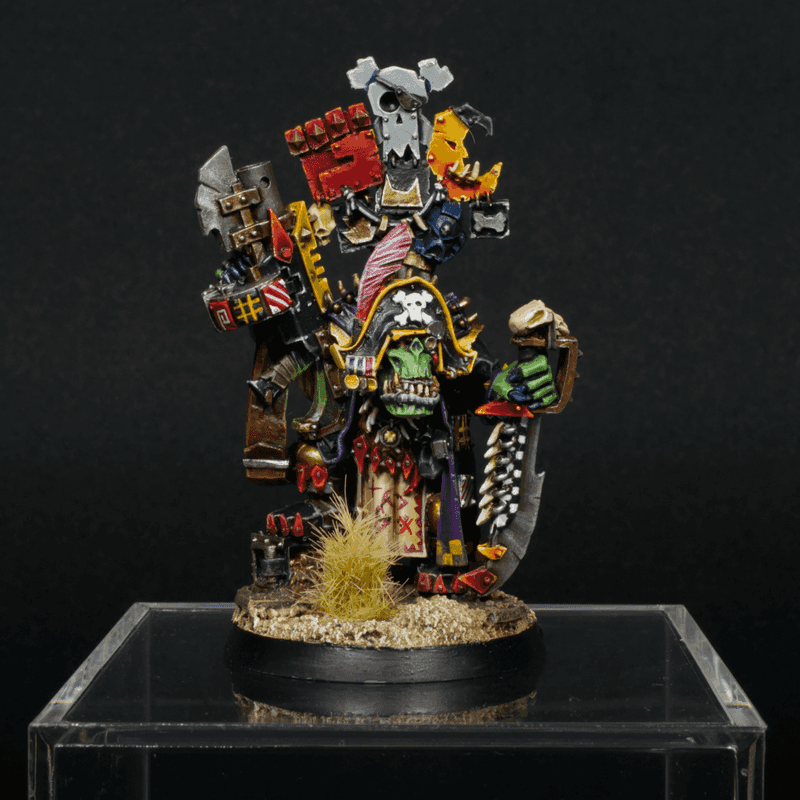
I do no colour correction to these images, and after that I simply crop and rotate slightly, and export the final image ready for the 'gram!
Tada! Hopefully this post sheds some light on how to get the most out of a DSLR for taking mini photos. I will definitely be refining my process and getting these looking even sharper (Going to try white backgrounds next to remove some of the ugly background blotching that's occuring in these images), but now I have a catalogue of consistent, high quality images of my miniatures which I can show off!
Speaking of that, if you want to see more of my work, check out my Instagram!


